How to Try Out Windows’ Blue Screen of Death (BSOD)
The Blue Screen of Death—affectionately known as the BSOD—is one of the most recognizable error screens in computing history. It usually signals something has gone seriously wrong with your system, but what if you’re just curious to see what it looks like? Whether you’re a tech enthusiast, student, developer, or just a little mischievous, it is possible to trigger the BSOD intentionally, safely, and without damaging your system.

Let’s walk through how to try it out—without frying your PC.
⚠️ First: A Quick Word of Caution
Triggering the BSOD should only be done for educational or testing purposes. You should:
- Back up your data
- Avoid doing this on your main device
- Never attempt this on someone else’s computer without permission
Now, with that out of the way—let’s get nerdy.
🧠 What Exactly Is the BSOD?
The Blue Screen of Death appears when Windows encounters a critical system error that it can’t recover from. Common causes include:
- Faulty drivers
- Corrupt memory
- Hardware issues
- Software bugs in kernel-level code
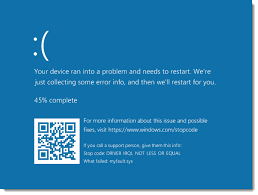
Windows halts everything and displays the BSOD to prevent further damage. It usually includes:
- A sad face ☹️
- A stop code (e.g.,
CRITICAL_PROCESS_DIED) - A QR code linking to Microsoft support
- Optional: a memory dump file for later analysis
In Windows 11, Microsoft even introduced a black version of the BSOD—so it’s not always blue anymore!
🔧 Method 1: Use Microsoft’s “NotMyFault” Tool
Microsoft provides a tool for exactly this kind of testing. It’s called NotMyFault, and it was created by Sysinternals (a trusted team at Microsoft).
🔹 How to Use It:
- Download the tool here:
https://learn.microsoft.com/en-us/sysinternals/downloads/notmyfault - Extract and open
NotMyFault.exe. - Run it as Administrator.
- Go to the “Crash” tab.
- Choose a crash type (e.g., “High IRQL fault (kernel mode)”).
- Click “Crash”.
Your system will immediately blue screen. 😎
🎛️ Method 2: Keyboard Shortcut Trigger (With Registry Tweak)
If you want to manually trigger a BSOD using a keyboard shortcut, Windows has a built-in method—but it’s disabled by default. Here’s how to enable it.
🔹 Step-by-Step:
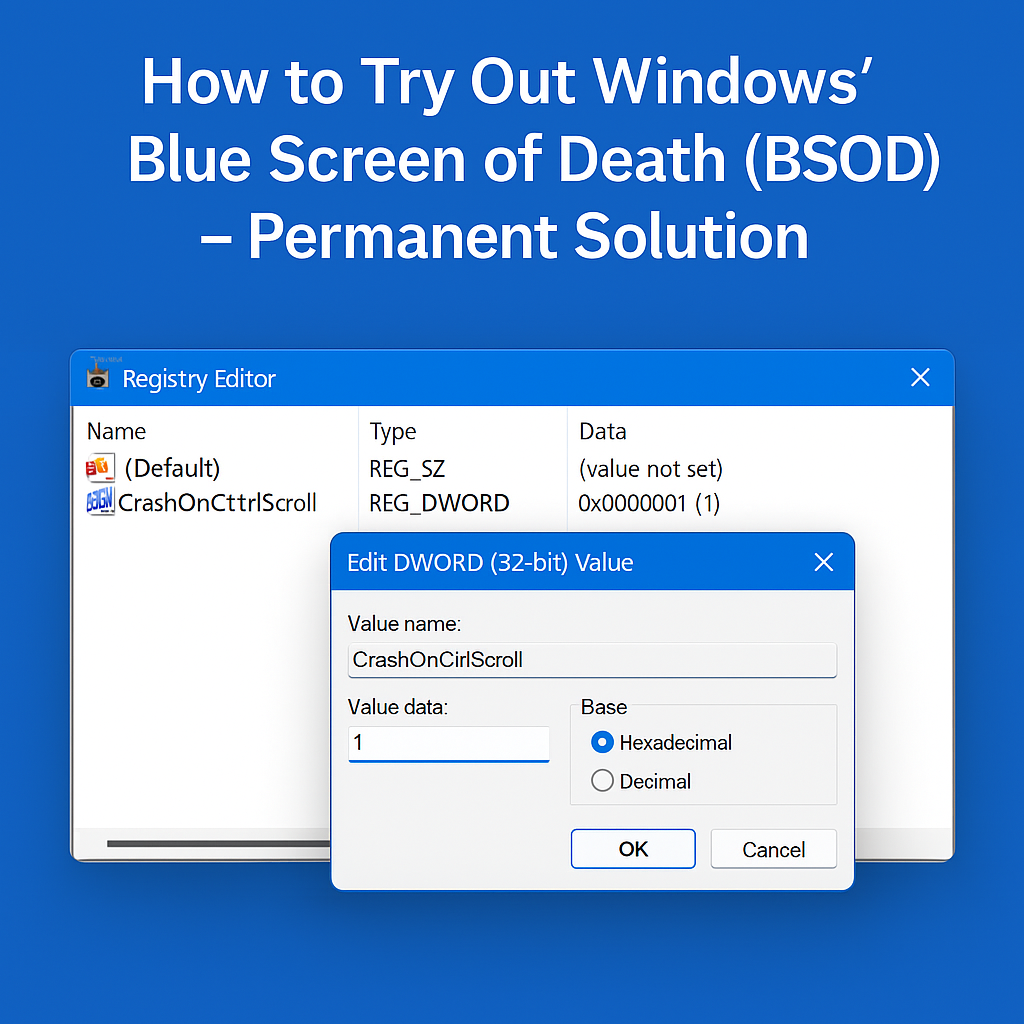
- Press
Win + R, typeregedit, and hit Enter. - Navigate to:
HKEY_LOCAL_MACHINE\SYSTEM\CurrentControlSet\Services\kbdhid\Parameters - Right-click in the right panel, choose New > DWORD (32-bit) Value.
- Name it:
CrashOnCtrlScroll - Double-click it and set its value to
1. - Restart your PC.
🔹 Now, to trigger the BSOD:
Press:
Right Ctrl + Scroll Lock + Scroll Lock
And boom—hello BSOD.
📝 Note: This only works with keyboards that have a Scroll Lock key, and it won’t function without the right USB keyboard driver.
🖥️ Method 3: Do It in a Virtual Machine (Highly Recommended)
Want to play it extra safe? Use a virtual machine (VM). Software like VirtualBox, VMware, or Hyper-V lets you run Windows inside your current OS.
Install Windows in the VM, then test the BSOD there using either of the methods above. Your real PC stays 100% safe.
🔍 Bonus: How to Analyze the Crash
Each BSOD generates a crash dump file—usually stored in:
makefileCopyEditC:\Windows\Minidump
You can open these files with tools like:
- WinDbg (Microsoft’s debugger)
- BlueScreenView (simpler third-party tool)
These help identify the cause of the crash, which is super helpful for developers or IT troubleshooting.
😅 But Why Would You Do This?
Fair question. Some legit reasons include:
- Learning: If you’re studying computer science, cybersecurity, or IT.
- Testing: Software and hardware engineers simulate BSODs during development.
- Curiosity: Some of us just like to see how things work (or break).
- Content Creation: Screenshots of BSODs are gold in tech tutorials and YouTube videos.
🚫 Don’t Use This for Pranks or Malice
Seriously—don’t use these methods to mess with people. Crashing a system on purpose without consent is never cool and could result in data loss or worse.
✅ Final Thoughts
The BSOD might have a scary name, but it’s also a fascinating part of how Windows protects itself when things go wrong. With the right precautions, you can safely explore what it looks like, how it works, and even how to fix issues it reveals.
Just remember: test responsibly and back up everything before you blue-screen your system on purpose.